Creating the First Flow
This tutorial is a guide to build a basic flow that shows every 5 minutes a text on the display.
The first version shows the text "Hello Automagic". The slightly more advanced version displays the formatted current time.
Step 1 - Creating a New Flow
Every automated processes in Automagic is modeled as a flow so we have to create a new empty flow first.
Please start Automagic and ensure that you are positioned on the flow list as shown in the following screen:
Please start Automagic and ensure that you are positioned on the flow list as shown in the following screen:
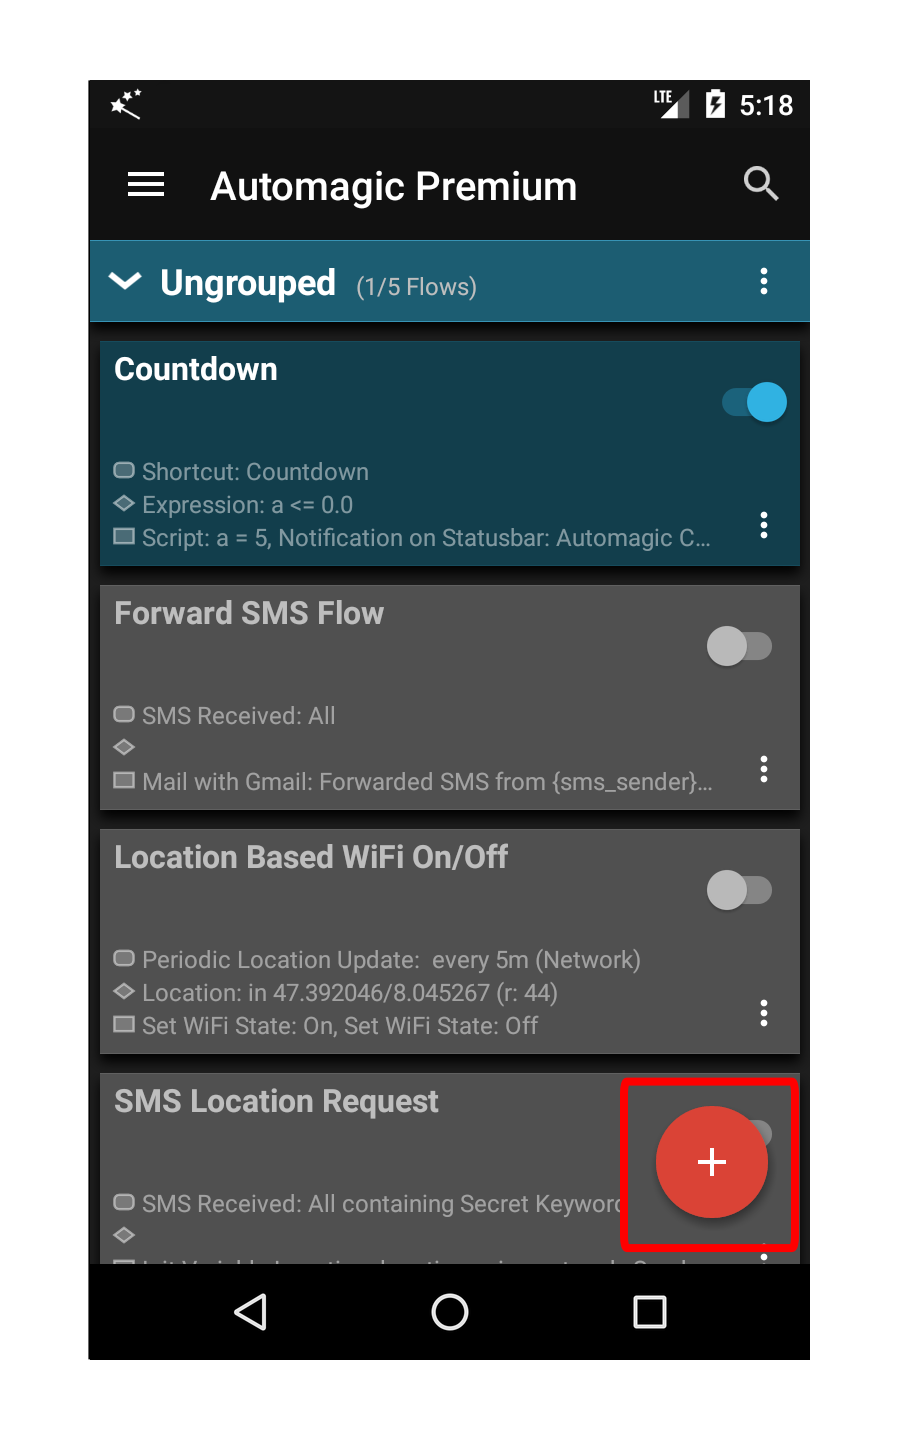
Select the red floating action button + to create a flow.
Step 2 - Adding the Trigger
In this step we are going to add a trigger that will execute the flow every 5 minutes.
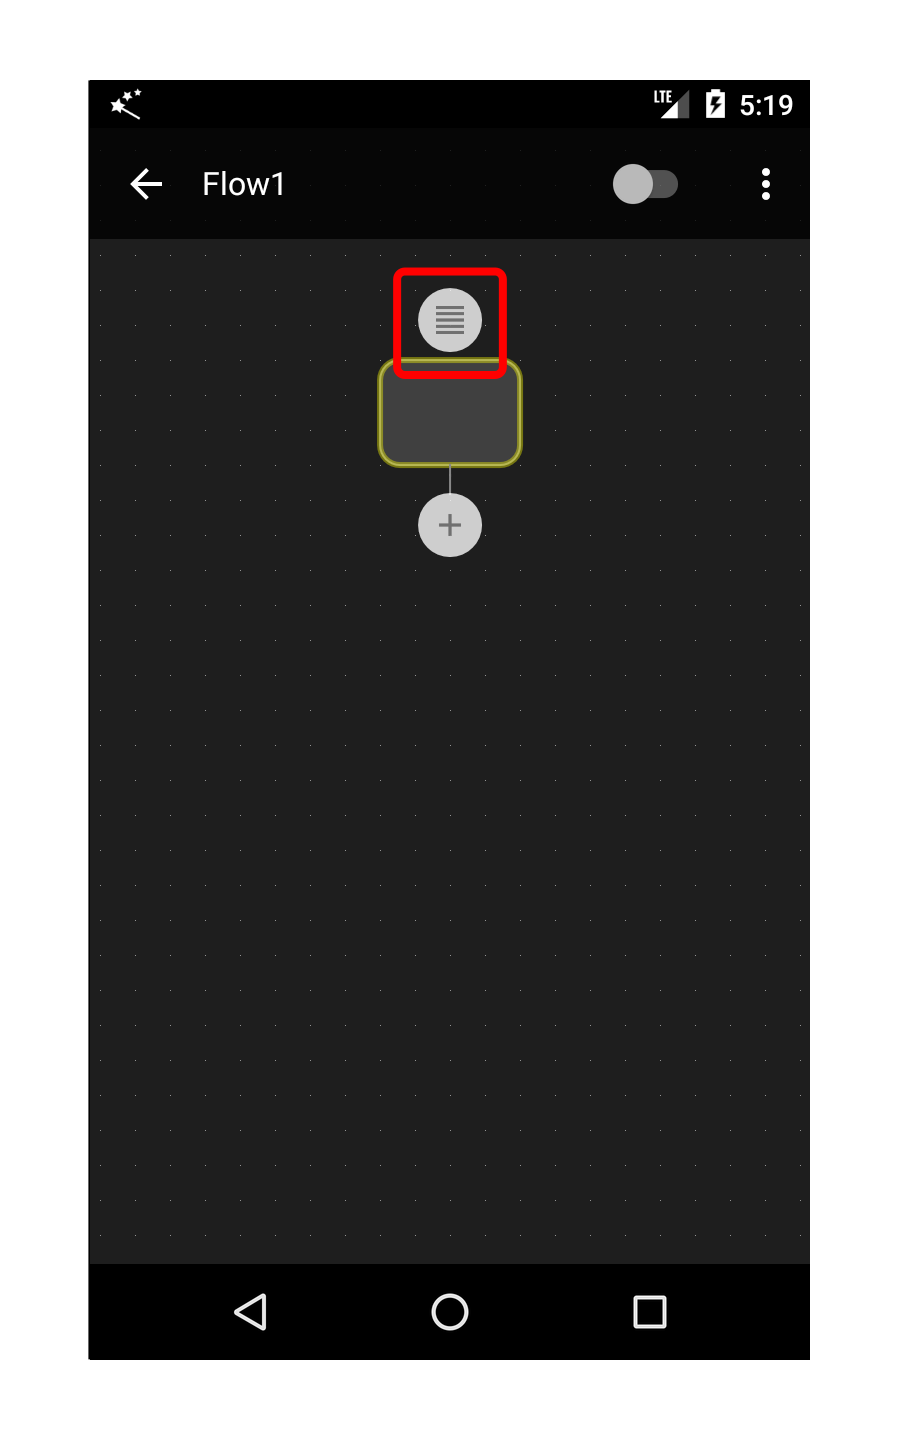
The gray rounded rectangle contains the triggers that automatically execute a flow. The rectangle is empty since we did not yet define the trigger to use.
Press the list icon above the rounded rectangle to show a list of existing triggers.
Press the list icon above the rounded rectangle to show a list of existing triggers.
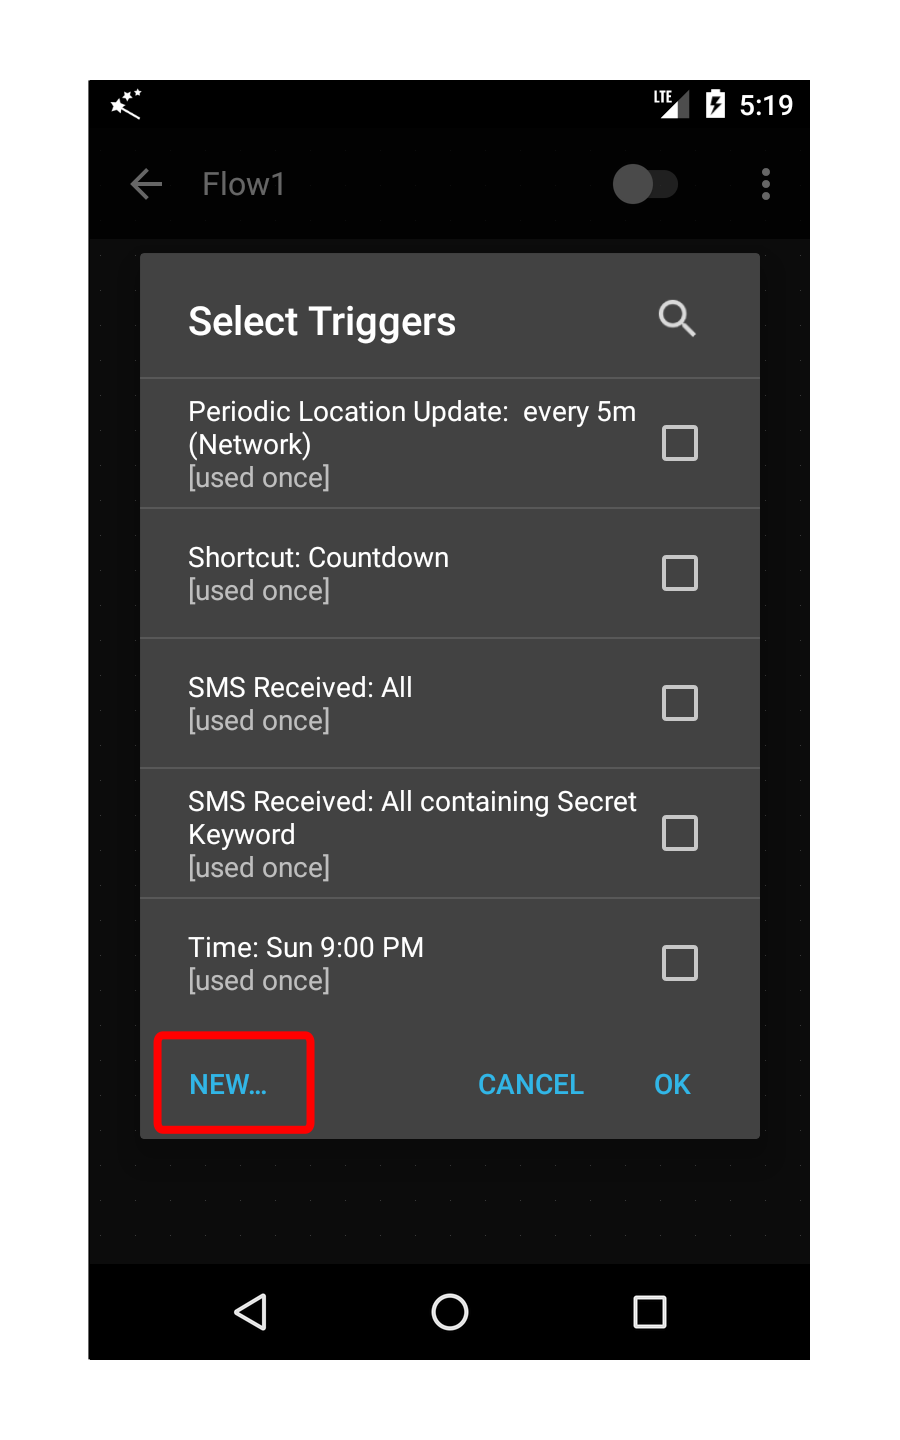
The list with existing triggers is displayed on the screen.
A 5 minute trigger does not exist yet in the list so we have to create a new one.
Press the New button to create a new trigger.
A 5 minute trigger does not exist yet in the list so we have to create a new one.
Press the New button to create a new trigger.

The list of all available types of triggers is shown.
Scroll down and select the trigger type Periodic Timer.
Scroll down and select the trigger type Periodic Timer.
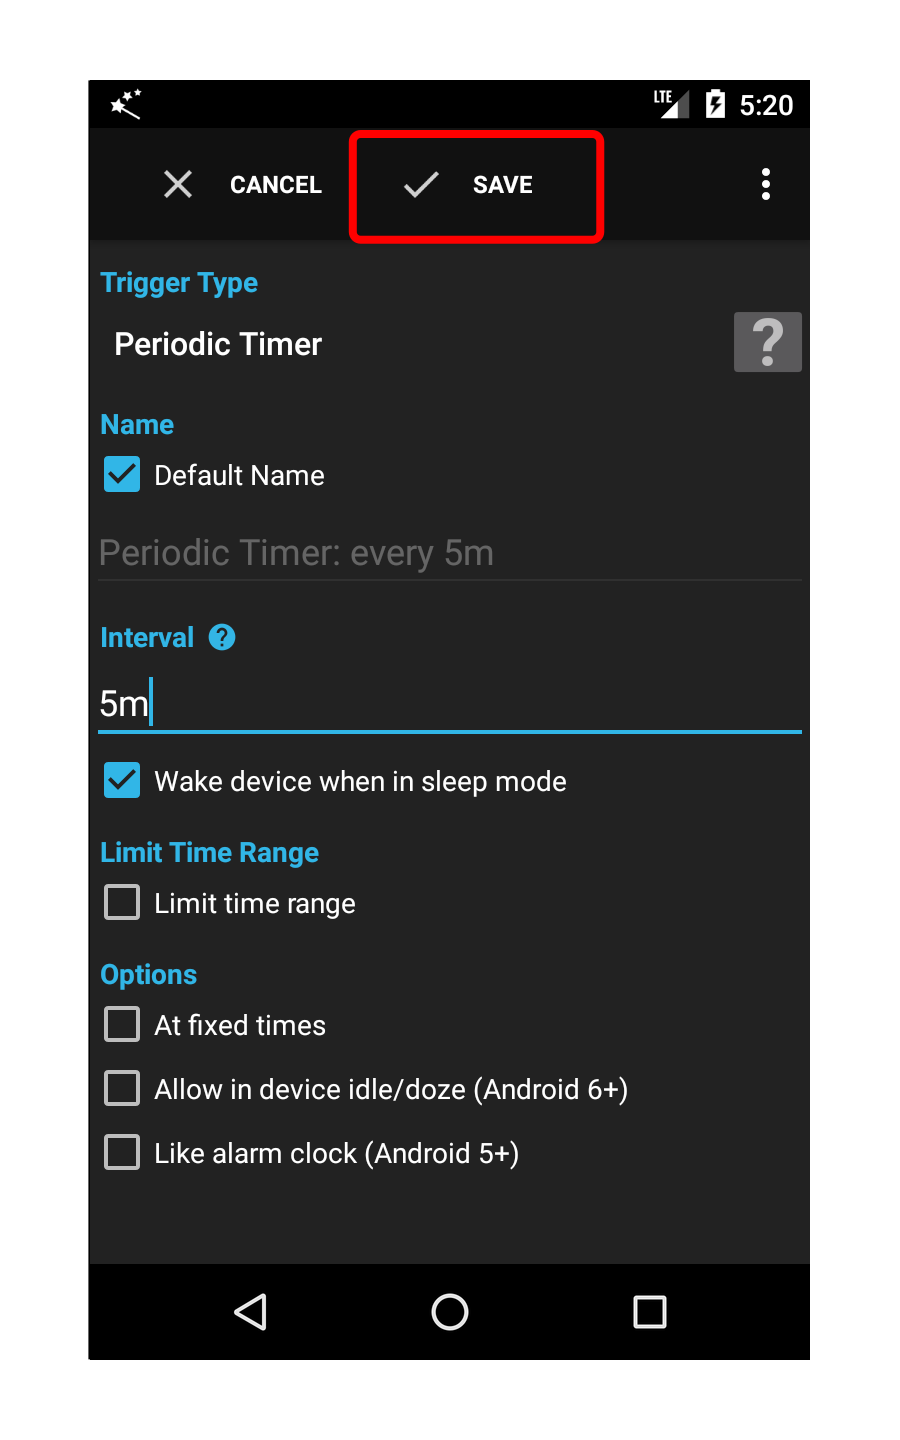
You can change the values in this screen to define how often the trigger will execute the flow by changing the interval to a different value like "2m" or "2m 30s". A help screen with a description of valid time intervals in Automagic can be accessed using the blue question mark icon.
There is also a more detailed description of each trigger type available using the ?-button.
You can use the default settings for this trigger and press the Save button.
There is also a more detailed description of each trigger type available using the ?-button.
You can use the default settings for this trigger and press the Save button.
Step 3 - Adding the Action
In this step we are going to add an action that will display the text "Hello Automagic" on the screen.
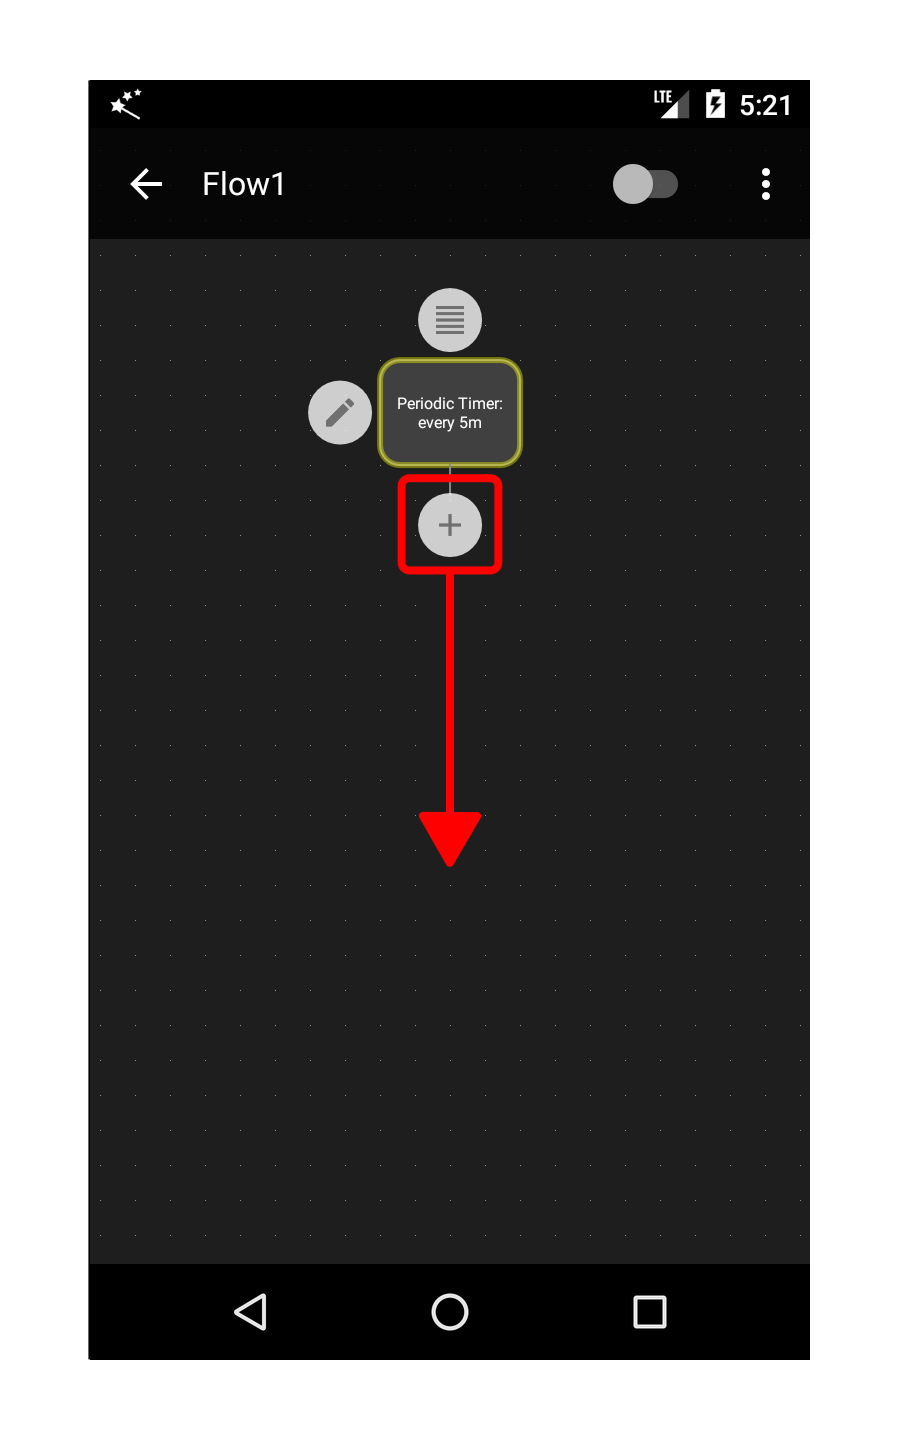
Press and hold the plus icon under the trigger and drag the icon down to a free area to add a new container for an action to the flow.

Select the container type Action.
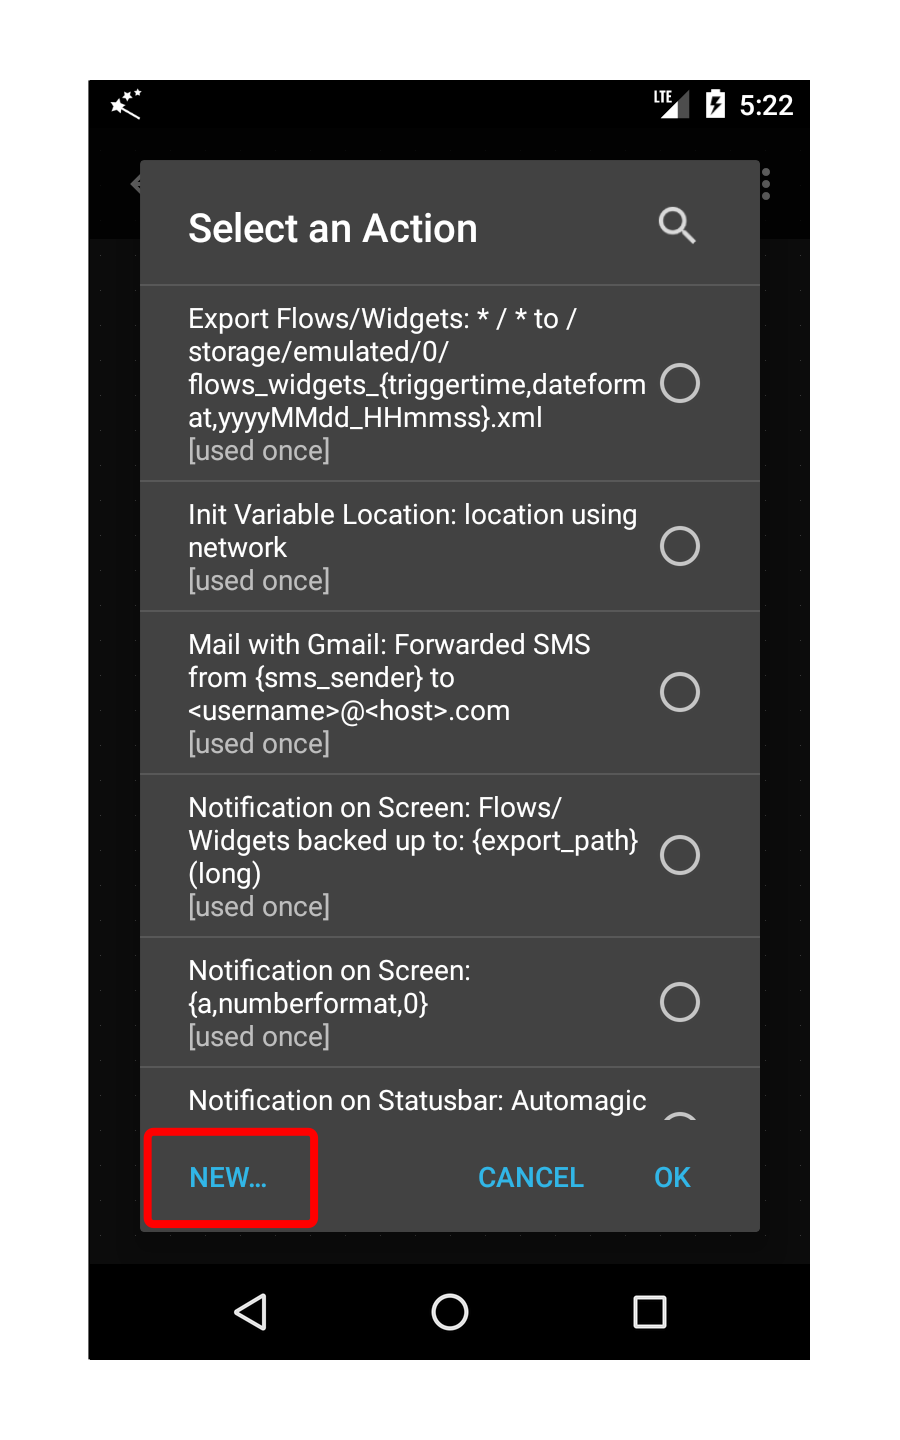
A list with existing actions is displayed.
Press the New button to create a new action.
Press the New button to create a new action.

The list of all available action types is displayed.
Scroll down and select the type Notification on Screen to display a simple text that automatically vanishes after a few seconds.
Scroll down and select the type Notification on Screen to display a simple text that automatically vanishes after a few seconds.
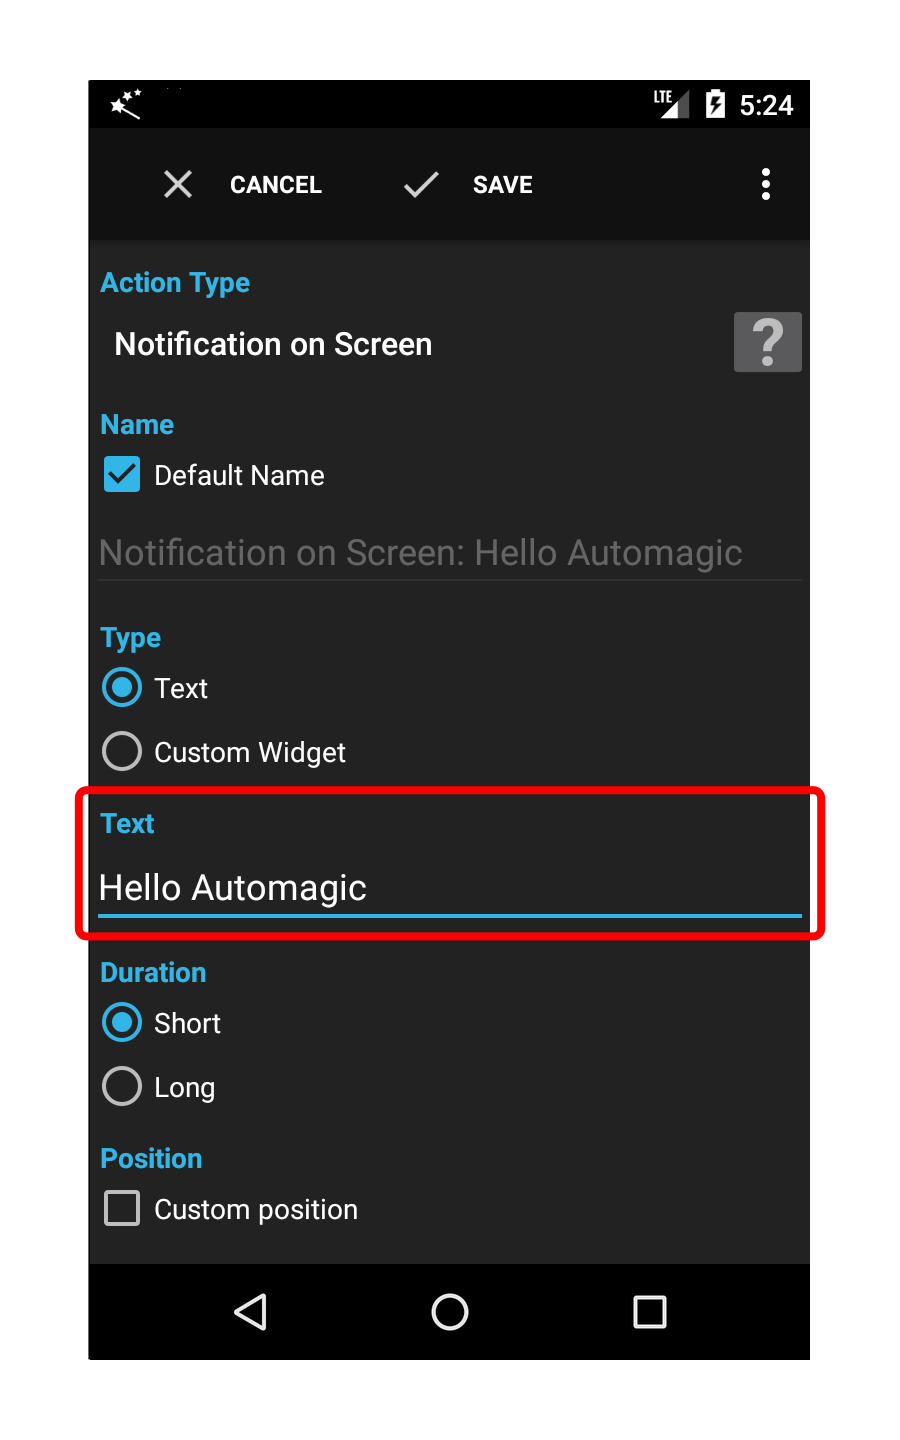
Enter the text "Hello Automagic".
Note that the name of the action is automatically adjusted to reflect your settings.
The name of the action must be unique within Automagic since an action is identified by its name. Automagic will check if an action with the same name already exists and allows to reuse an already existing action.
Note that the name of the action is automatically adjusted to reflect your settings.
The name of the action must be unique within Automagic since an action is identified by its name. Automagic will check if an action with the same name already exists and allows to reuse an already existing action.
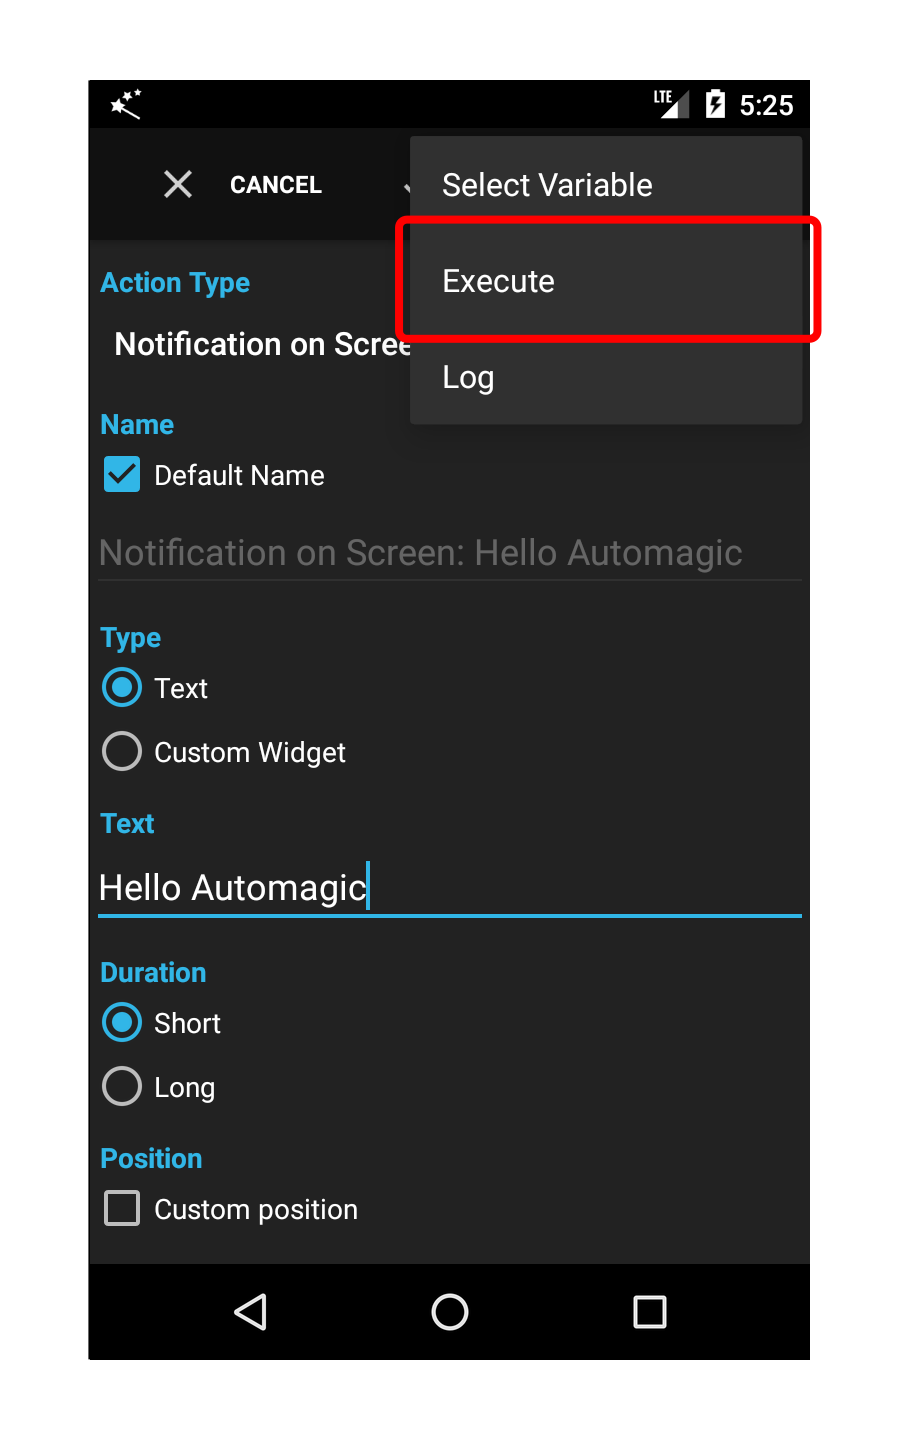
It is often required to test if the settings of an action are correct and the action does what you want.
Open the menu and press the Execute menu item to test the action.
The action is executed in complete isolation. This means that the rest of the flow is not executed. The action itself is executed for real, this means that an action that is configured to delete a file on the device will really delete the file when executed using the Execute menu item.
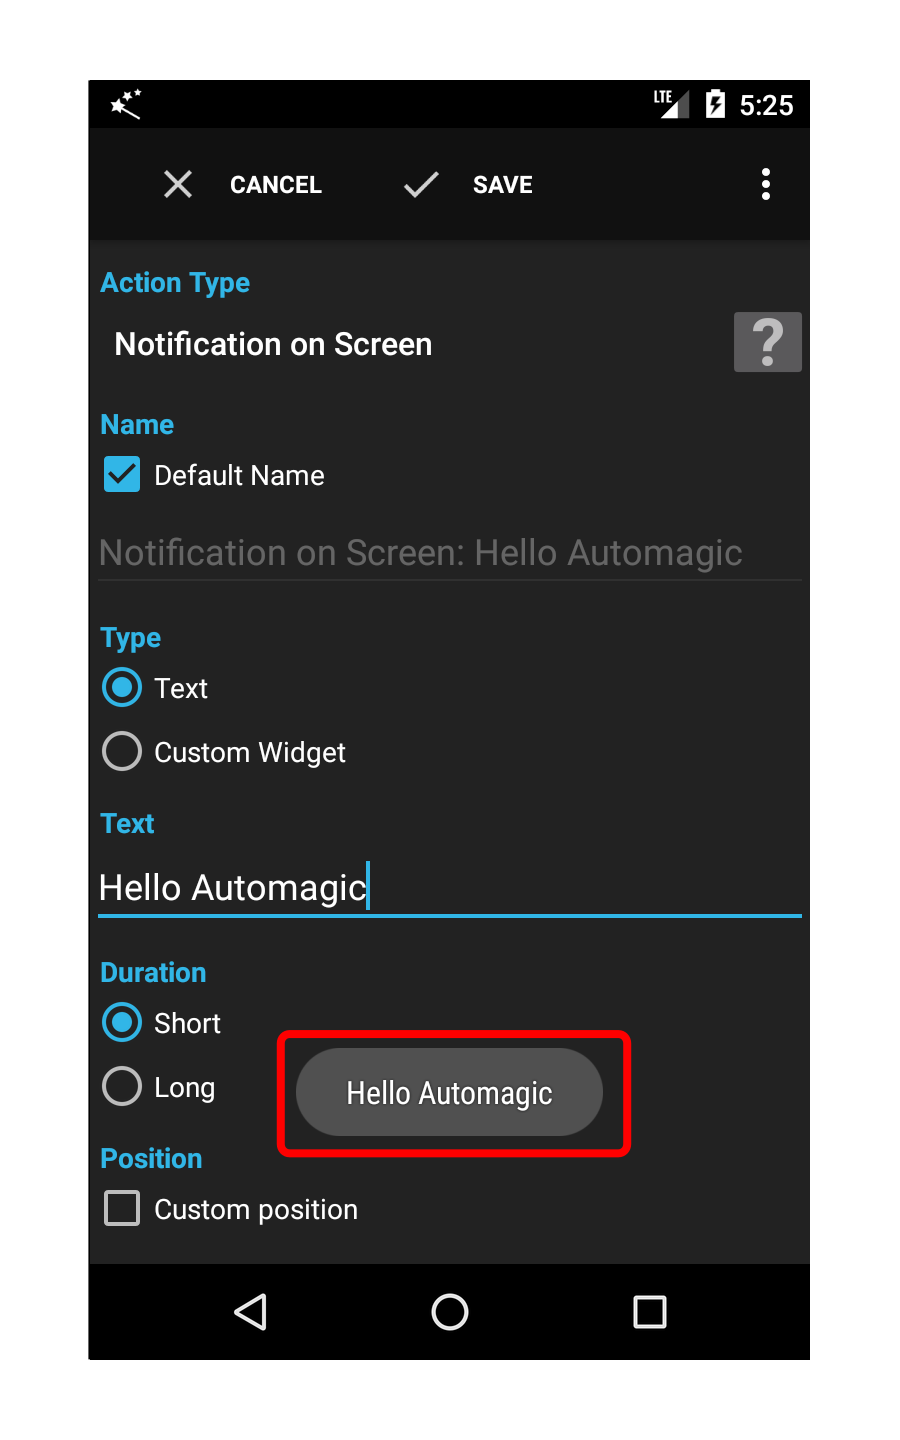
Ensure that the displayed text matches your expectations.
Press the Save button to accept the values of the action.
Press the Save button to accept the values of the action.
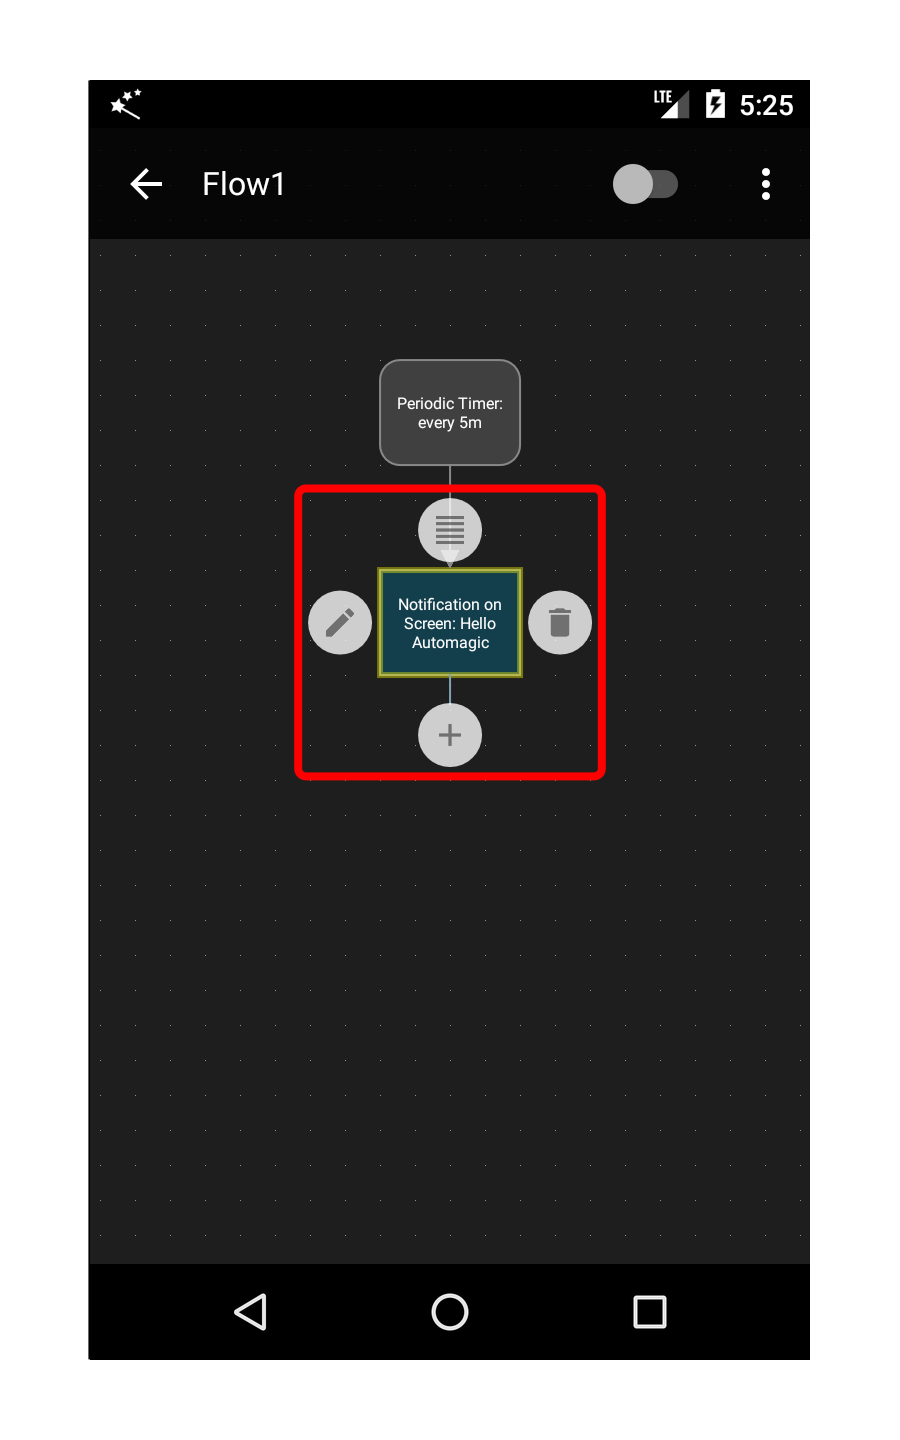
The action is now displayed in the flow.
Step 4- Manually Starting a Flow
In this step we are going to add an action that will display the text "Hello Automagic" on the screen.
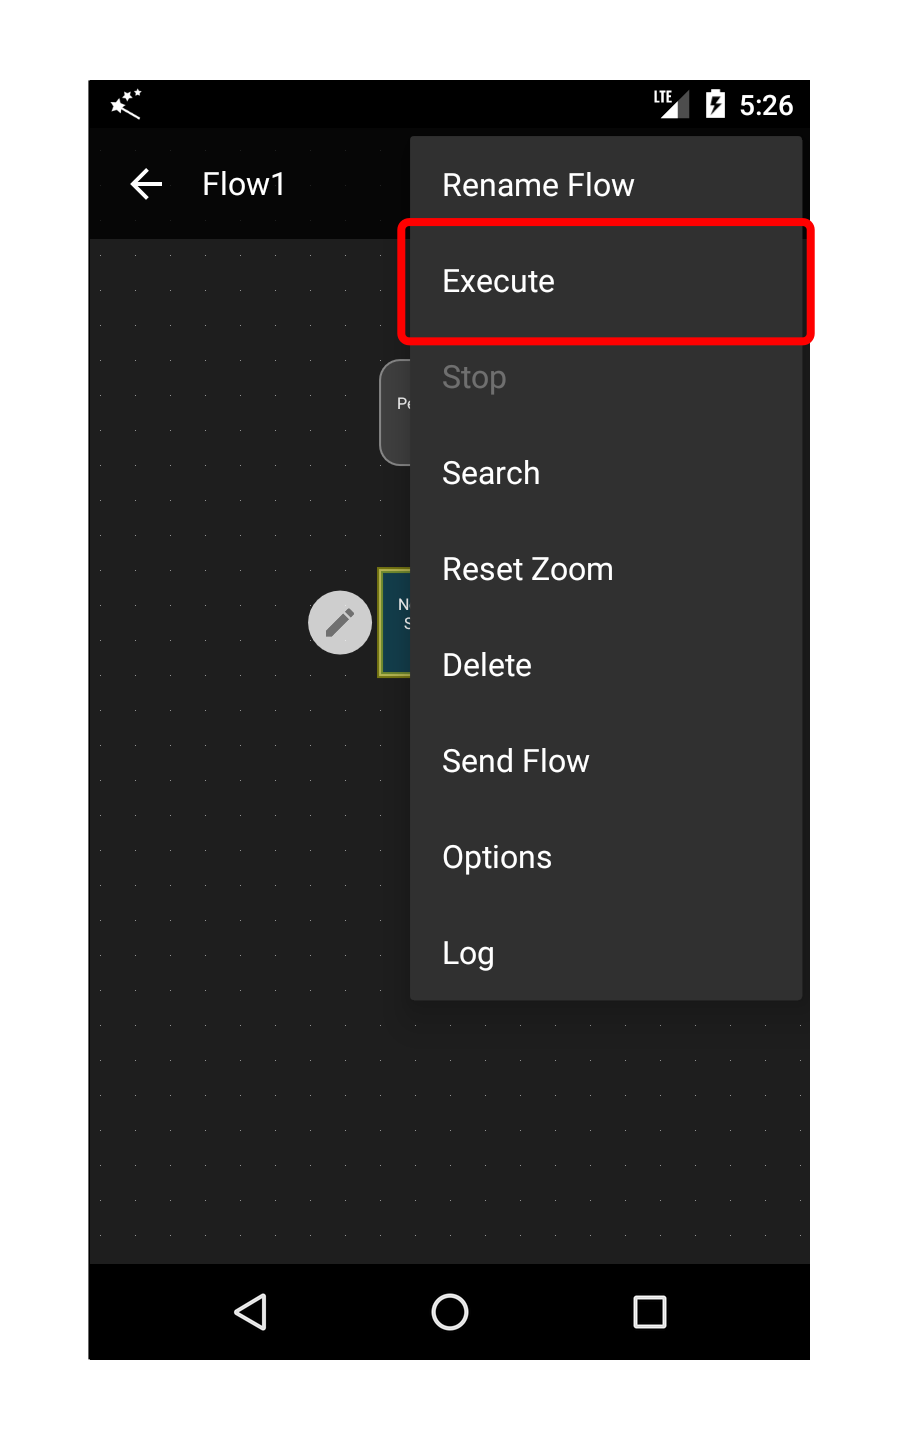
Open the menu and select the Execute menu item.
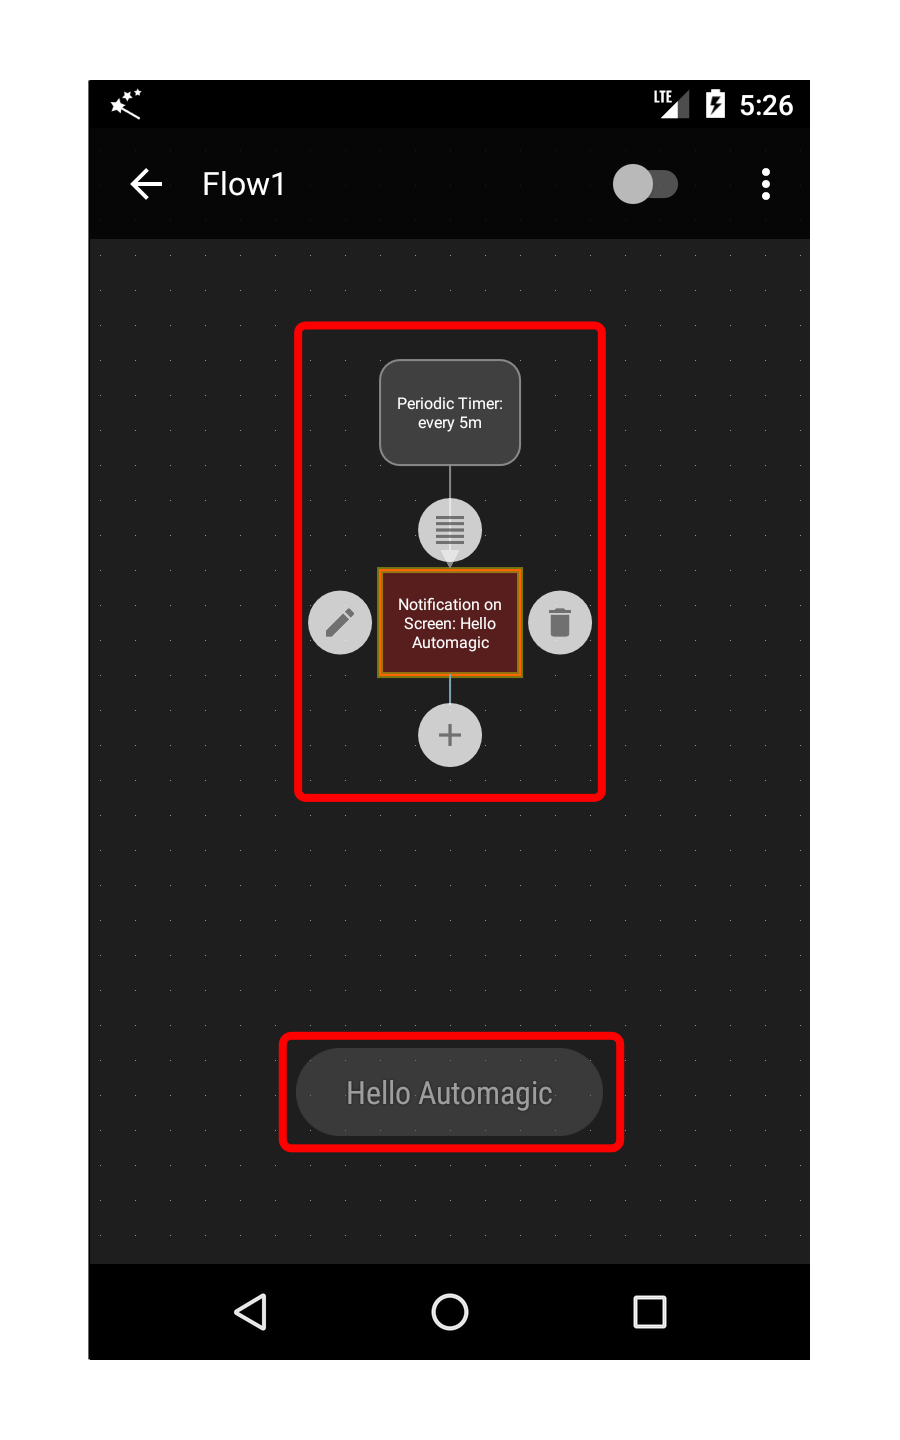
The flow displays the currently executing element in red. There also exists a menu item Stop to interrupt a flow if you see that there is a problem and you want to stop the flow early.
The text "Hello Automagic" should be shown as soon as the action "Notification on Screen" is reached.
You can now enable the flow by turning the switch button to ON.
The flow is registered in the system and will be executed every 5 minutes automatically from now on.
The text "Hello Automagic" should be shown as soon as the action "Notification on Screen" is reached.
You can now enable the flow by turning the switch button to ON.
The flow is registered in the system and will be executed every 5 minutes automatically from now on.
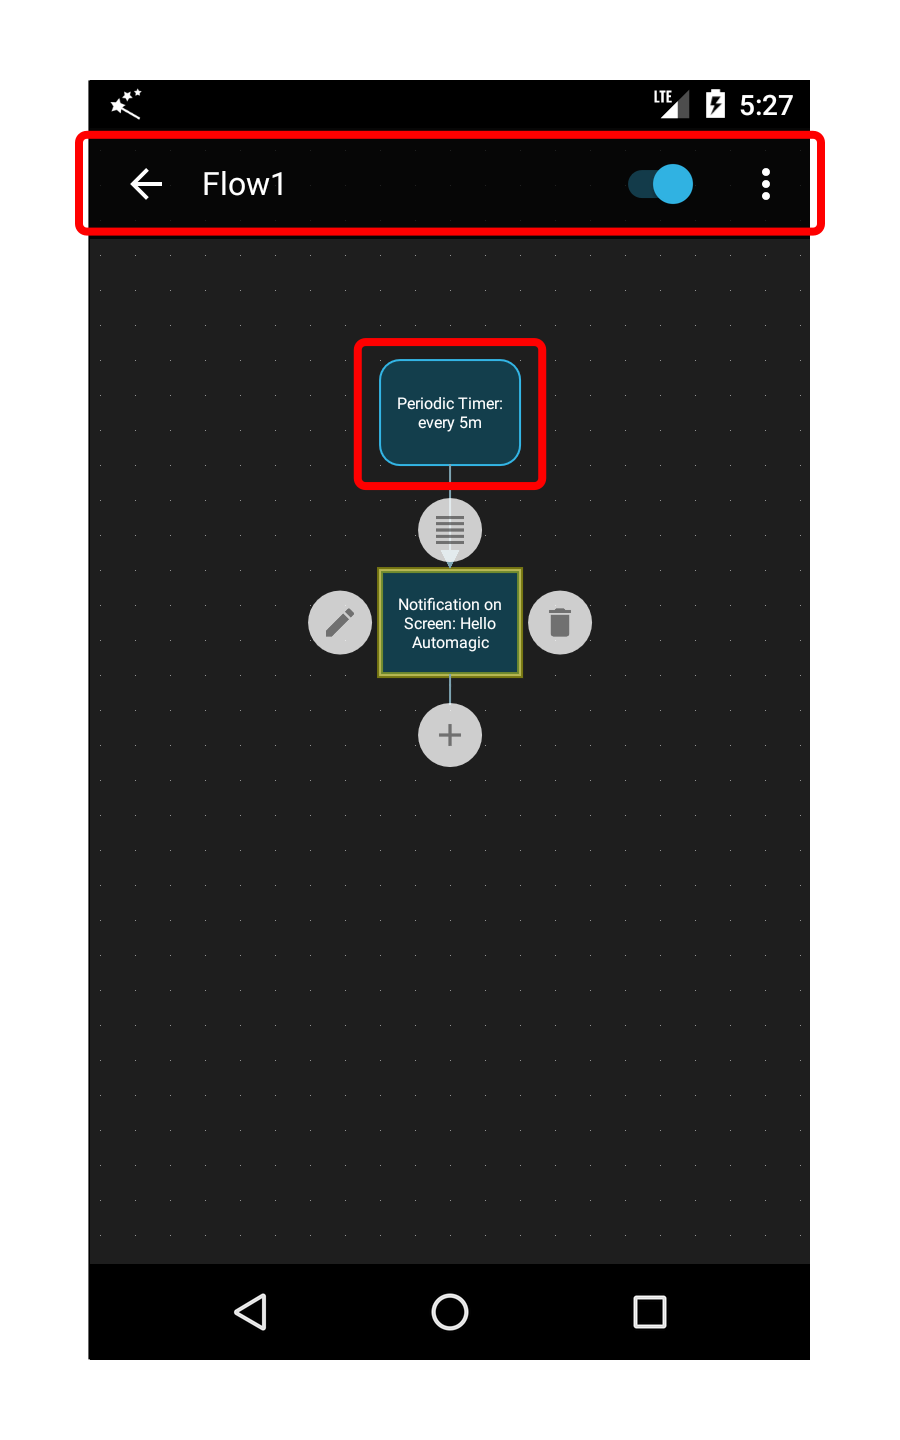
Note that the container with the trigger changes the background color when the flow is enabled.
You can rename a flow opening the menu and selecting Rename.
You can rename a flow opening the menu and selecting Rename.
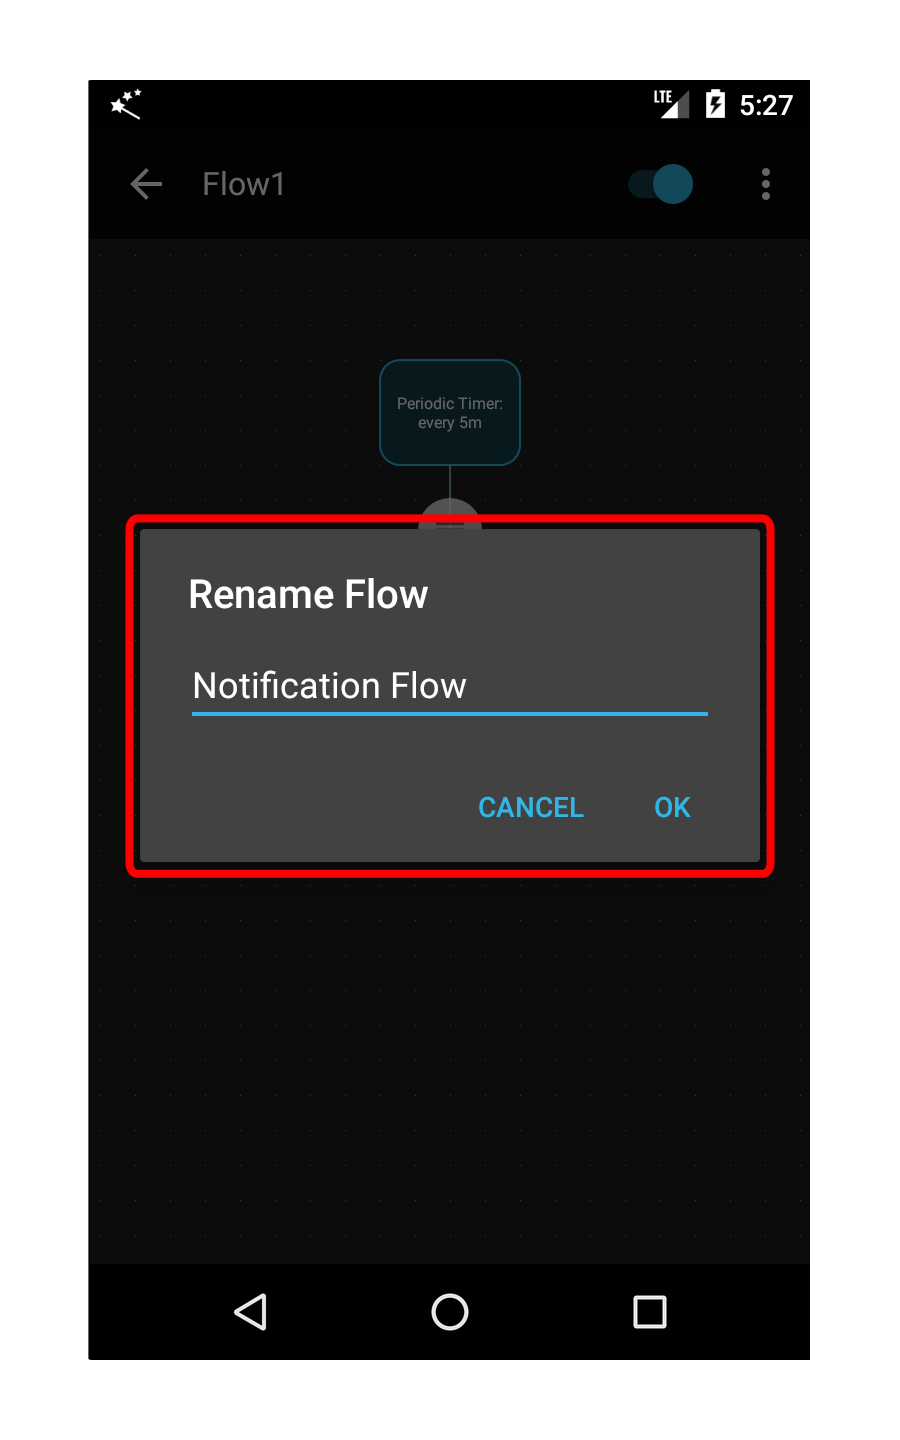
Rename the flow to "Notification Flow". The name of a flow must be unique within Automagic.
Step 5 - Extend the Flow to Show the Current Time
In this step we are going to enhance the flow to show the current time instead of the static text "Hello Automagic".
The time (and optionally the date) can be shown using a variable. Almost all text fields allow to define a dynamic text by using a variable in curly braces {}.
The time (and optionally the date) can be shown using a variable. Almost all text fields allow to define a dynamic text by using a variable in curly braces {}.
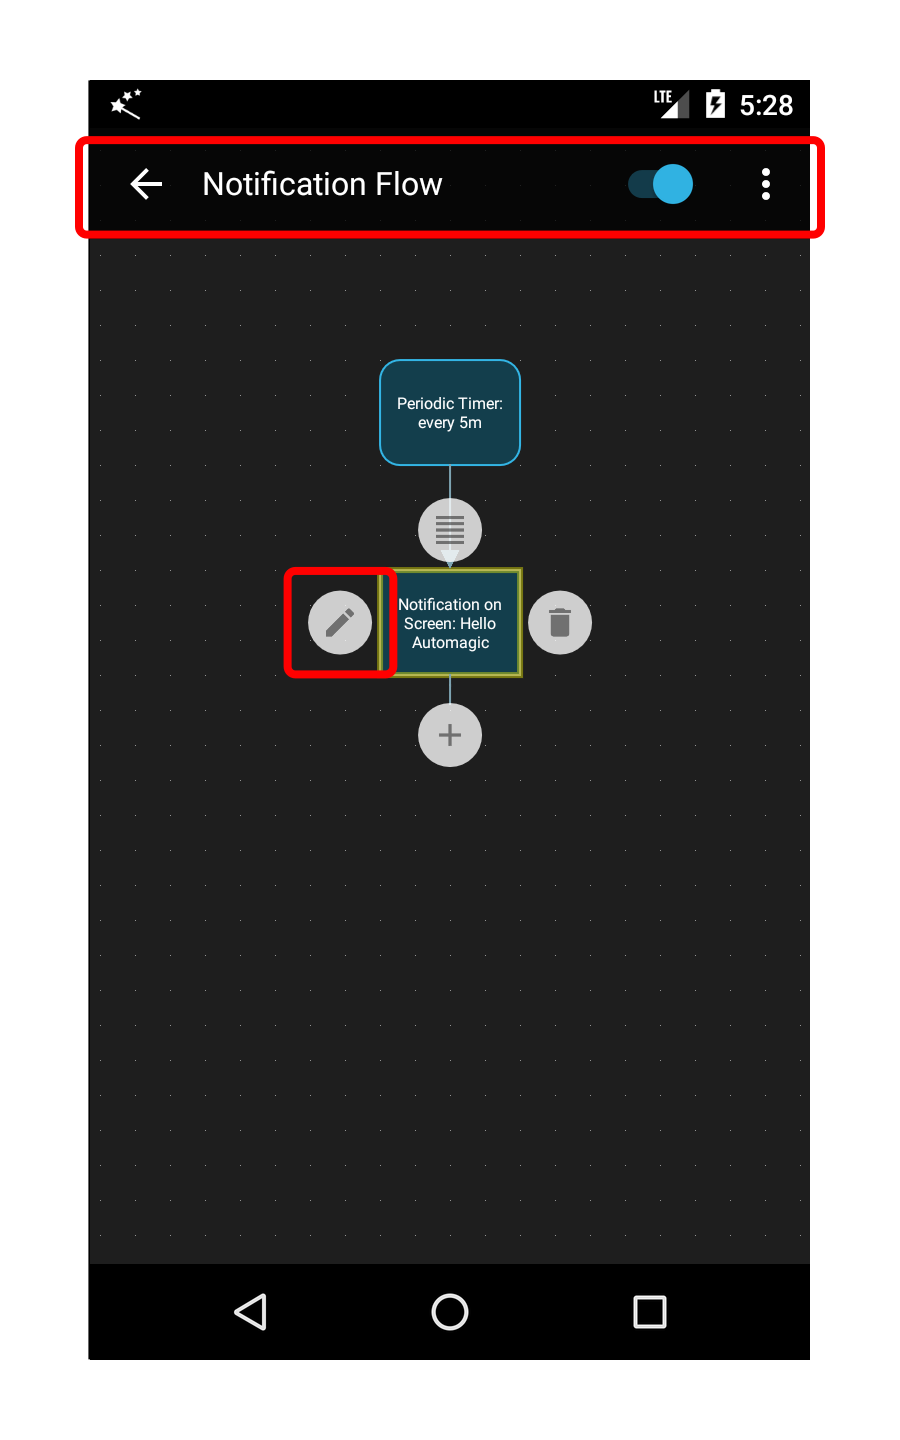
Press the edit icon to directly open the editing screen of the action.
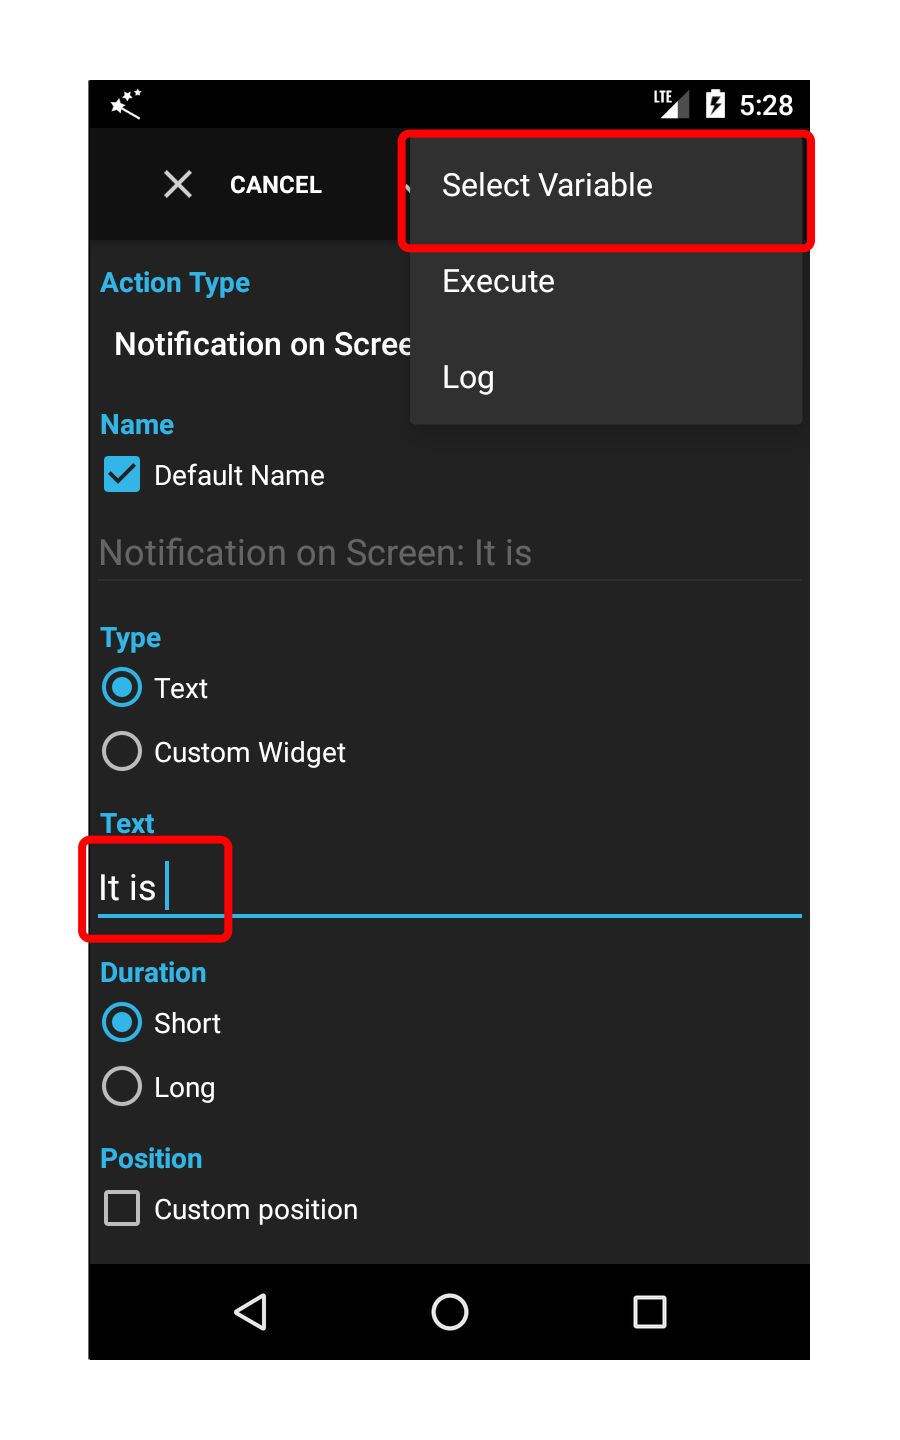
Change the text to "It is " then open the menu and select the item Select Variable.
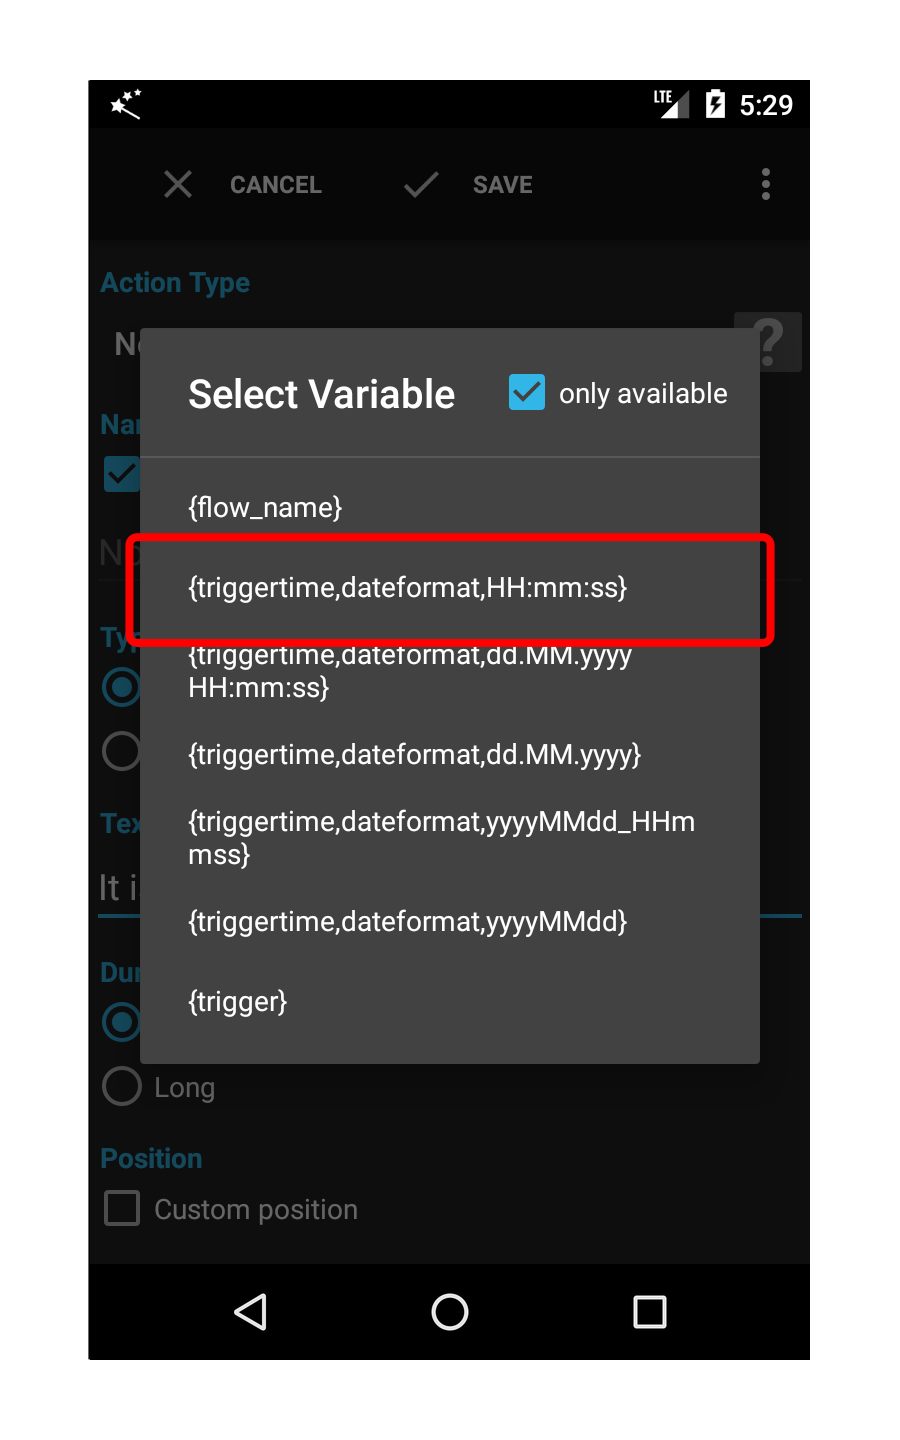
Automagic determines the variables that are likely available when the flow execution reaches this action.
One of the variables available in all flows is the variable triggertime. It contains the date and time when the trigger has been executed.
The first five entries in the list show usage examples of this variable with three different formatting options. The first entry formats the time using the 24-hour format with minutes and seconds.
Select the first entry of the list.
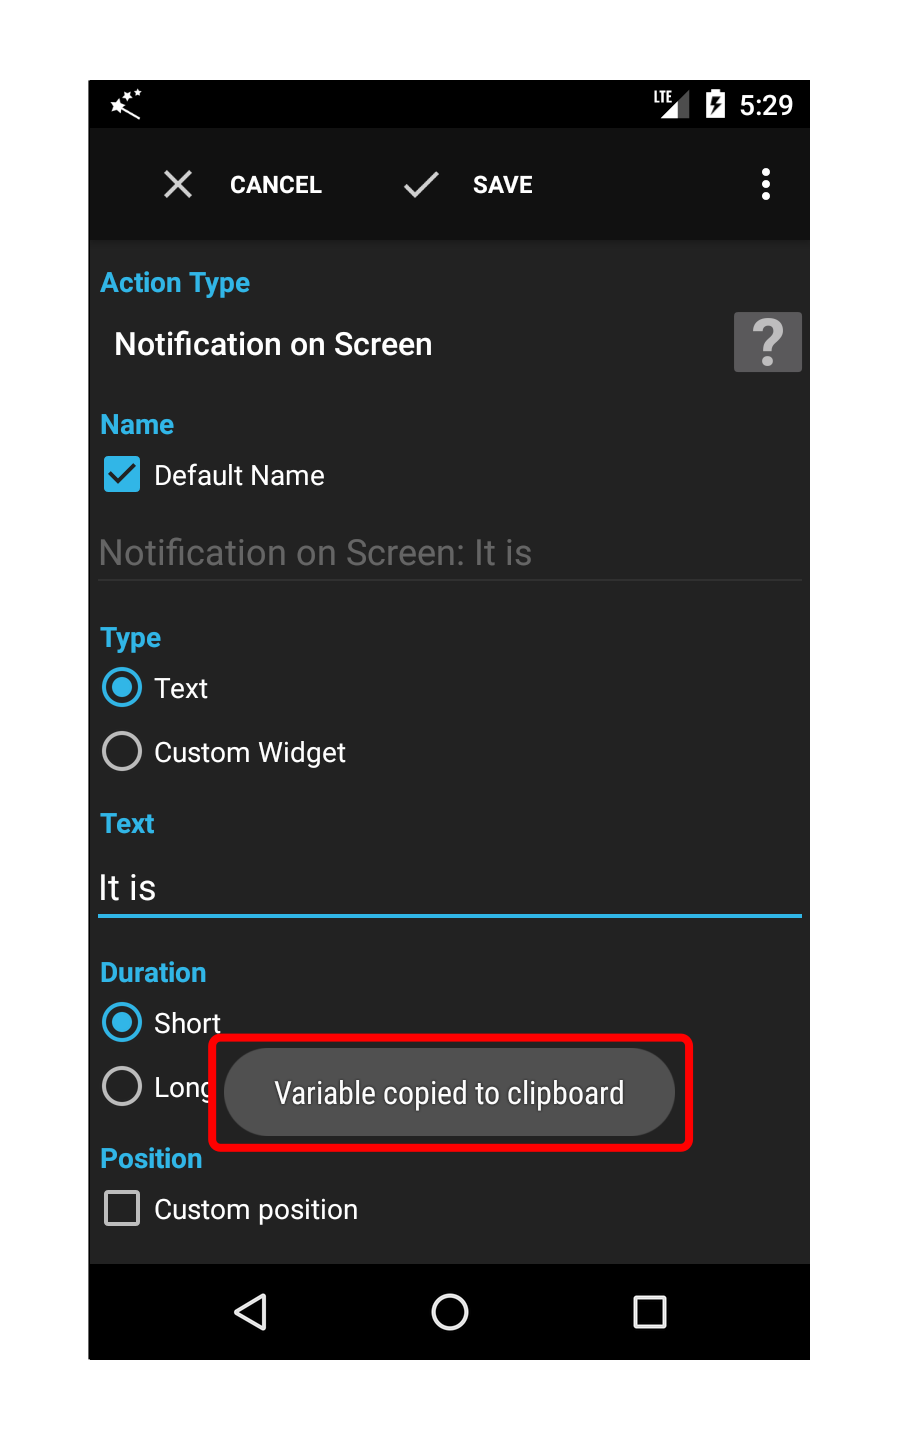
Notice that the selected variable is copied to the clipboard.
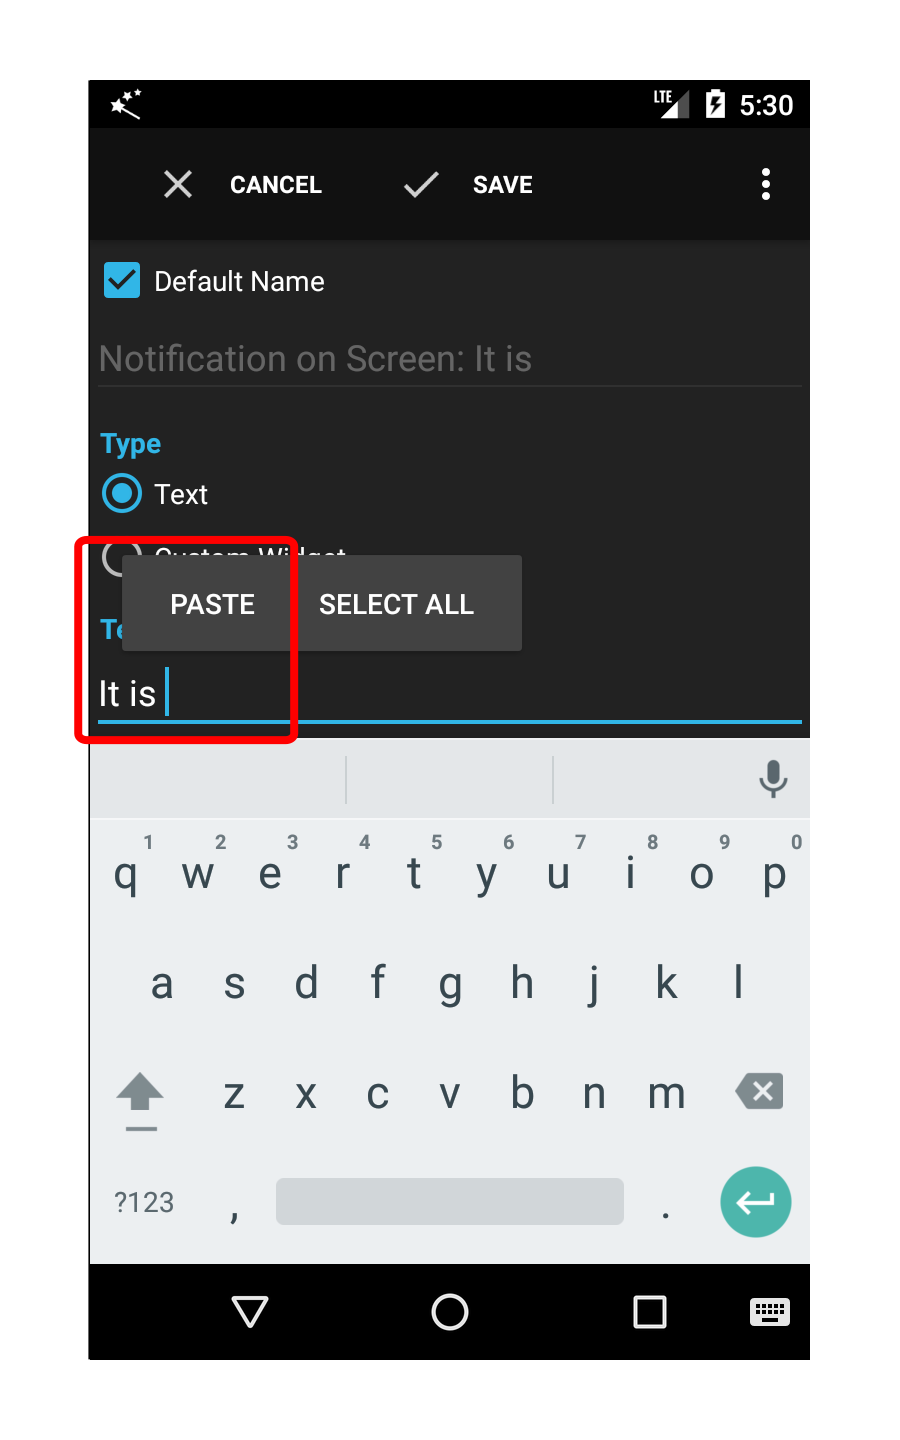
Long-press the text field to paste the contents of the clipboard into the text field.
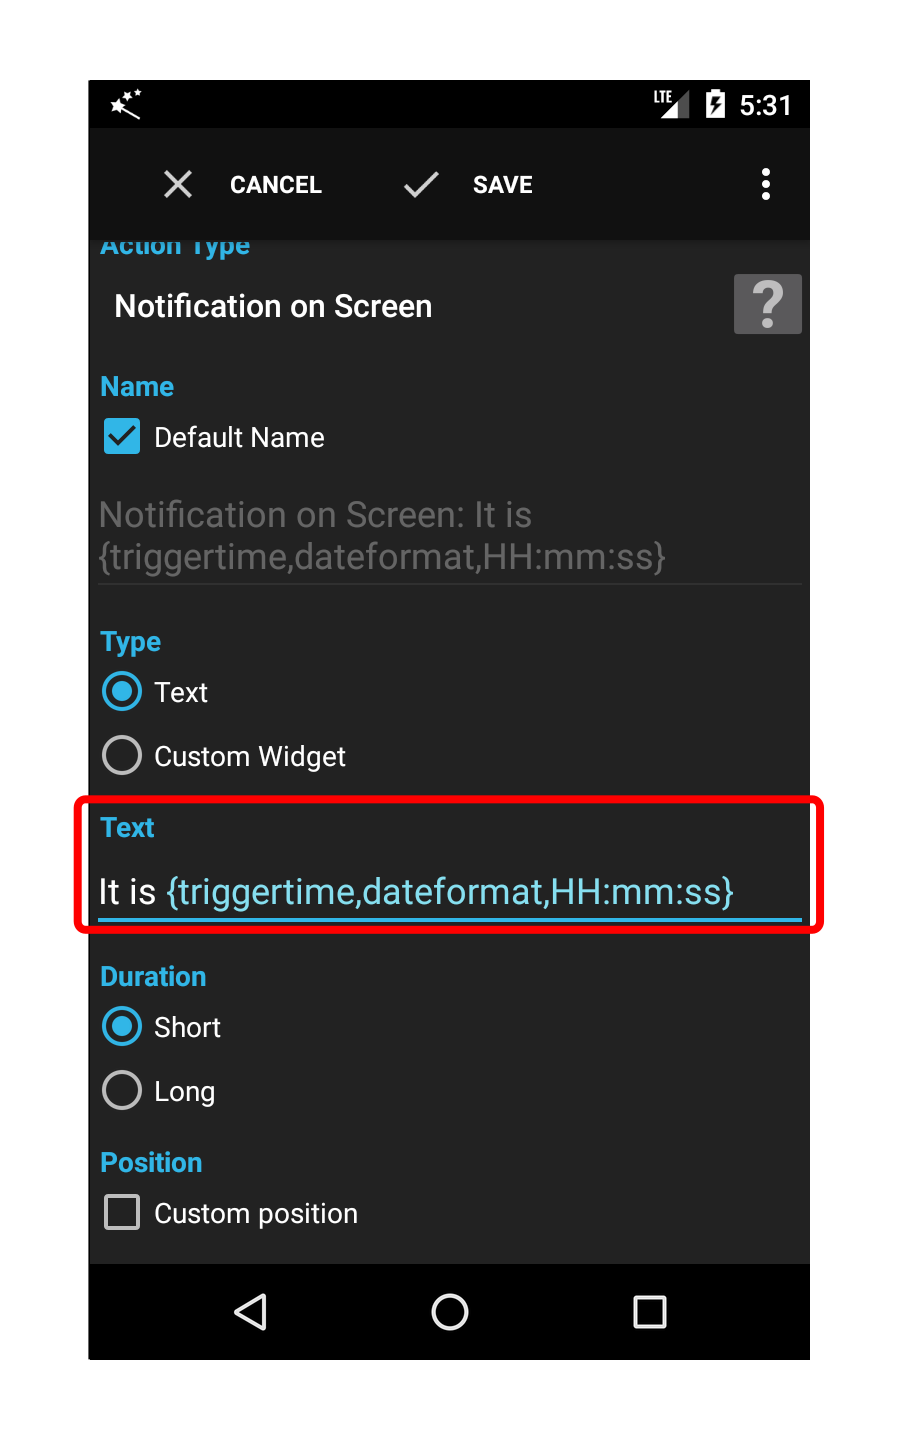
The variable is rendered in blue to indicate that this part of the text is dynamic and will be replaced when the action is executed.
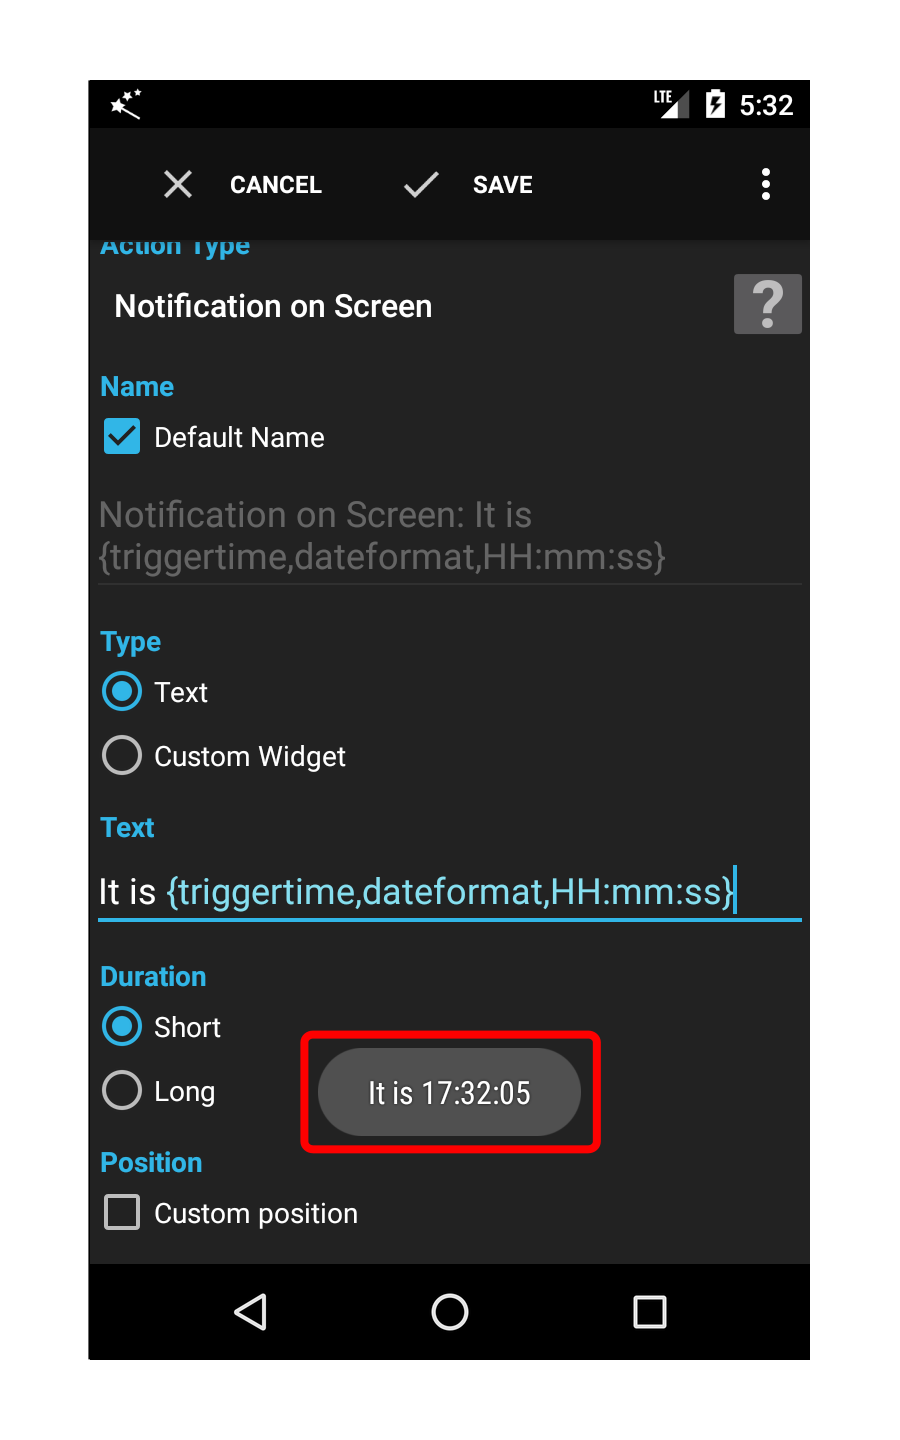
Open the menu and execute the action. The current time should be displayed.
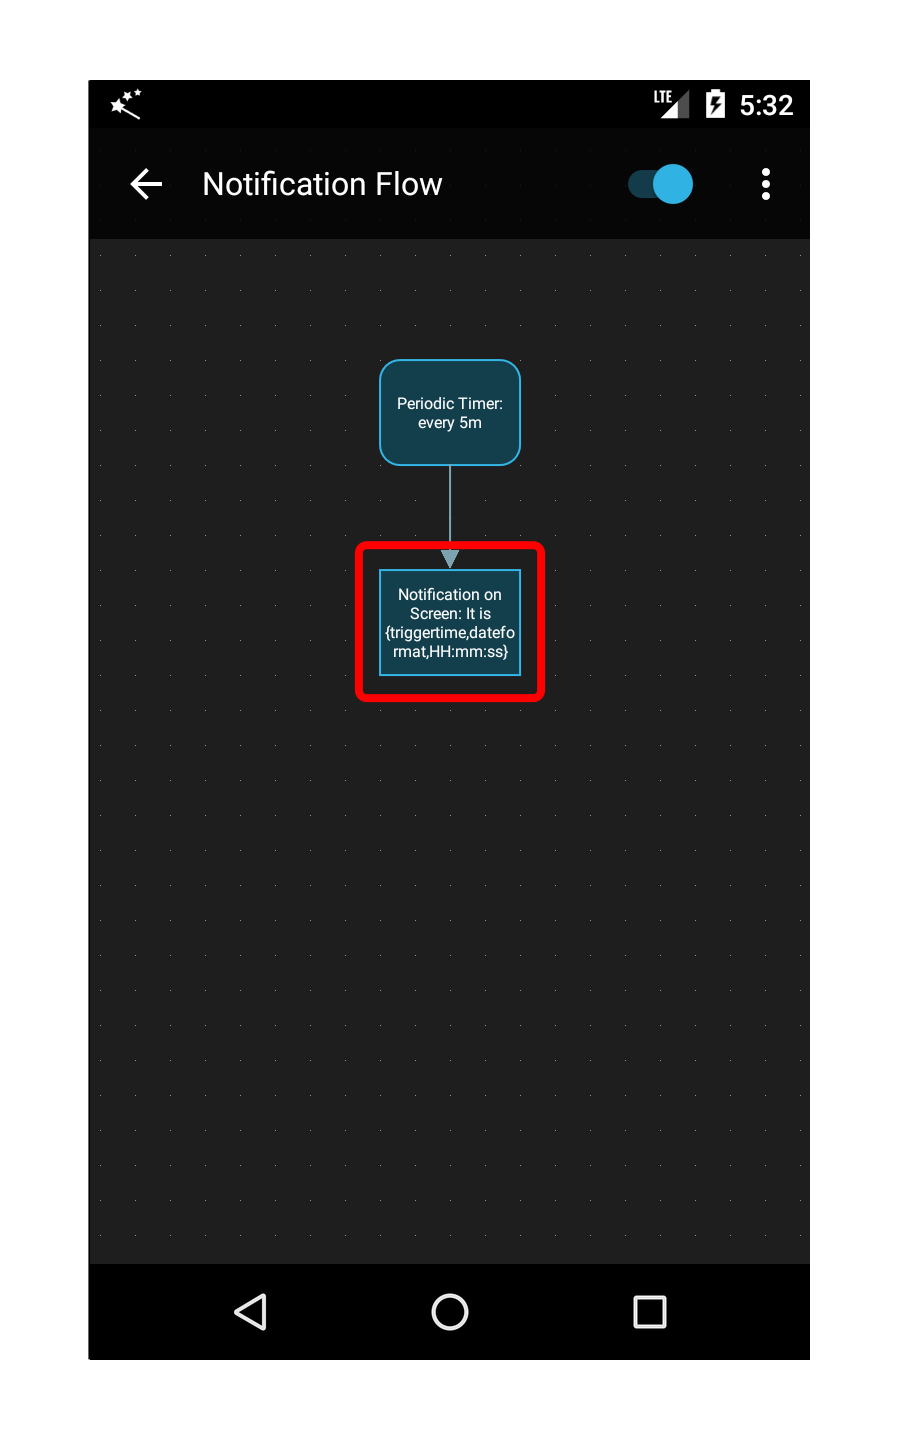
You can now save the action. Notice that the action name has been automatically adjusted to reflect the new text of the action.